Tuesday, February 28, 2012

Picture Day

The day began with alpacas.  Dan and I went to our friend Tara's house to photograph her with her alpacas.  She has 13 of them, and a few babies on the way. 
That's Tara with her spinning wheel and some of the alpacas.  She spins and knits or weaves with their wool.  They will be sheared in April. 

I got to steady the stepladder and carry Dan's camera bag.  The wind was blowing, it was about 45 degrees, and I was freezing.

Next was my photo.  The one below is the only one Dan forwarded to me.  He wanted to get a shot of the store with blue sky and me hanging a quilt on the clothesline (which is just for today).  He picked this quilt because of the size and color. 

I think the photo project is over for now.  He took pictures of seven of us and now has to do some editing.  The idea is to show up of the area with various artisans in their setting, not to highlight the art work. 

We have decided to open the store for the Thanksgiving weekend tour this year, so this may give us some exposure.

Sunday, February 26, 2012

Moving Day

We moved my Gammil long arm on Friday.   I'm happy it's finally accomplished and I like its new home, but I still have a lot of adjusting to do and things to find homes for.  Dan estimates the table and machine together probably weight about 800 pounds, so of course, it had to come apart.  He had a friend help, so I didn't have to lift anything.  He has a few sore muscles.  They had to take it out the back door and then around the building and back in my studio door.

Here are a couple of "before" pictures of part of my studio.
And here are the "after".

The large wooden table still needs to be moved, but I managed to quilt a baby quilt this morning.  I know I'll use the machine more now that its in "my" room.  For one thing, I won't have to heat and cool the other room in order to use it.  This room has much better light, so its easier for me to see what I'm doing.

Now on to my next project.  We have a tour group coming through on March 7th, about a dozen people.  I have to give a short presentation about my work and "show and tell".  They are bringing box lunches, but eating them in my house.  So now I have to clean the studio and my house.  In case I haven't mentioned it, my house is just behind my shop.  I love being able to just walk over any time to work.

Tomorrow our American Sewing Guild group meets.  I have 2 baby quilts and 9 pairs of children's p.j.'s finished for the Coalition Against Domestic Violence.  Then either tomorrow afternoon or Tuesday, depending on the weather, Dan is going to photograph me hanging quilts on a clothesline on the front of the shop.  He's doing a series on local artists that are going to be sent as part of a tourism package.  He's gotten some great ones, so far, but the deadline is looming.  I'll post mine here if he'll let me.

Wednesday, February 22, 2012

Other People's Projects

For the past week, I've had this feeling of being overwhelmed.  I'm sure you all know what I'm talking about.  Between getting my studio ready for the "big move", helping family, trying to finish up some projects, and just the day to day stuff, I really feel like I just need to step back and make a list of what's really important.  So I put the Seminole Sampler on hold, folded up the antique quilt blocks and put them in a drawer, and started cleaning the studio.  I am now ready for the machine to be moved, Dan is coordinating it with a couple of his friends.

During my cleaning spree, I found two small projects that I felt I should either give away, throw away, or finish.  So I finished them.  This first one is a block that I did not make.  When my shop was open, I went to Quilt Market and one year I bought a group of patterns from a lady who include a ready-made sample block if you bought X amount (I don't remember how much).  The block was unquilted, but I hung it up with the patterns and I think they sold rather quickly.  So I decided to make it into a small wall quilt.
The wings are made from half a doily and the halo is a D-ring.  These were included with the pattern.  I hand quilted it and am putting it away for a small gift for next Christmas.  Its 13" by 16".

Then I found a plastic bag with English paper piecing parts.  A number of years ago I got my mom interested in this method and she made a single bed quilt in pinks and greens.  She still uses it on the foot of her bed.  These two blocks were basted, but needed to be sewn, so I finished them.  I plan on making a couple of round pillow with a ruffle.  The photo is awful, but you get the idea.  They are about 14" across.
A few weeks ago a friend called and asked me to applique some quilt blocks for her.  She is in her 80's, has poor eyesight and is about to have cataract surgery.  She was trying to complete a block of the month before her surgery, and just couldn't see well enough to do the applique.  There were 8 blocks that needed to be done, the 4 center blocks shown below and 4 corner blocks.  I have to admit I put it off.  So finally last weekend I made myself sit down and do them.  I'll deliver them to her this weekend and I'm sure she'll have time to finish the quilt before she has her operation.  She'll have me quilt it, so I'll post a picture when its done.
I have several quilts coming in over the next week, so I'm going to concentrate on those before I go off on another tangent. 

Wednesday, February 15, 2012

Seminole Patchwork, Part 4

This is the final pattern for this series.  If you are new to this blog, please look back over my last 5 posts.

1.  Cut 2 strips of white and 2 strips of black, 1 1/4 inch wide.
2.  Cut one strip of gray, 3" wide and cut it in half.
Sew together as shown.  You will have a grey/black/white strip that is 22 inches long and 2 strips of the black and white, one is 22 inches and the other is 44 inches long.
3.  Cut the grey strip into 3 inch segments ( you will only be using 4 of these). 
4.  From the black/white strip cut 14 1 1/4 inch segments and 6 3" segments.
This photo should give you an idea where we are headed.  Sew the center section together and then sew on the sides.  Your finished section should look like this.
You might have to play around with the order to form the correct "checkerboard" pattern.  The extra little black and white blocks shown above are going to be used in assembling the sampler. 

I'm still working on the sampler, and it might be next week before I am able to show it to you.  In the meantime, I've started putting together the vintage quilt that I showed you here.  I should have that top completed by next week also.

I am preparing for the "big move".  We are moving my Gammill longarm machine from the small backroom of the store into my studio room.  My studio is much larger and has wonderful light, especially on sunny days like today.  But it means putting away a lot of stuff and doing away with two large tables.  The back room is going to become the photo studio for the Artisans Guild.  Hopefully, I'll be organized and moved by the end of next week.

Saturday, February 11, 2012

Seminole Patchwork, Part 3

If you have been reading my posts for the past week, this is the third in the series.  There will be one more instructional post and then another with directions for putting all the strips together in a sampler.

This is the pattern for today.
1.  Cut 2 strips of gray and 2 strips of white, each 1 1/4 inches wide.
2.  Sew together as shown below.
3.  Press the seams in one direction.
4.  Cut the sewn strip into 1 1/4 inch segments.
Now sew them together as shown to create the "checker board".

Do this in two sections, which is what you'll need for the sampler.  You can make this as wide as you want, but always use an even number of strips.

Check back on Tuesday for the next lesson.

Thursday, February 9, 2012

Seminole Patchwork, Part 2

I had intended to post this on Tuesday, but I pulled a muscle in my back while trying to clean under the bed.  It just doesn't pay to be a housekeeper. 
Anyway, its better and here is the patchwork strip for today.
It is similar to the previous one, but has a more complex center.
1.  Cut two strips 2 1/2 inches of the yellow.  Cut one strip each of the black and white 1 1/4 inches each.
2. Sew the black and white together and then add a strip of yellow on each side.
3.  Press seams as shown below.
Cut this long section into 2 inch segments.  Remember the rule about cutting the segment the width of the center strip?  Well in this case the center is 2 inches after the strips are sewn together.  The finished band will be about 6 inches wide and 36 inches long after trimming.
Sew the 2 inch segments together, matching the points as shown in the first photo.

Here is a picture of a block I made for a kit where I used 5 colors in the center.  Each of the center strips was 1 1/4 inch wide, but I only "stepped" it down one color, so I cut the segments 1 1/4 inch each.

Enjoy your day, its finally gotten cold here.

Monday, February 6, 2012

Seminole Patchwork, Day One

Today I'm going to show you what I think is the most simple of the Seminole Patchwork strips.  If you have not seen my previous blog entry, to HERE for an introduction to this series.

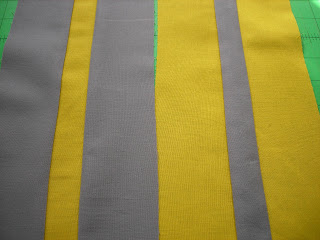
First I 'd like to talk about fabric selection.  Large prints or prints that have a high contrast are not suitable.  The prints conflict with the small patches.  Select solids or blenders like batiks or Moda Marbles.  I decided to use gray, yellow, black and white solids for my demo because of the high contrast.
If you are planning on making this sampler along with me, pick at least 4 fabrics.     You'll need a total of 2 yards.  I'm going to be using less of the black and white and more of the gray and yellow, so I will probably need about 3/4 yard of each of the gray and yellow.

For the first strips, I will be using just the gray and yellow.  (all cuts are by width of fabric unless otherwise stated)
1.  From each of these fabrics cut 2 strips 2 1/2 inches wide and 1 strip 1 1/2 inches wide.
2.  Sew the strips as shown below (use 1/4 inch seams throughout)
3.  Press the strips so that the seams go in opposite directions.  i.e. they either face each other in the middle or they both go out towards the raw edges.
This is important.  The reason will become clear as you sew, but basically its to avoid bulk where the seams meet.

4.  Cut each strip into 1 1/2 inch segments.  Here is a rule to remember when making this strip.  Always cut the segment by the width of the center (the original width, not the sewn width).  You can make these strips larger or smaller by varying the width of the strips, but this rule is the same.
5.  Stitch the segments together.  Sew in pairs, then match those pairs and so on until you have one long strip.  The bottom of the gray block is matched to the top of the next. (see below)


I like to chain these as I sew.

Once all the segments are sewn together, you will have a strip approximately 36 inches long.  These will be trimmed later when we come to the point of making the sampler.
Note how all the points meet perfectly and the centers are perfect squares.  This is a nice technique for making borders in quilts.
Let me know if you have any questions about this.  We'll do another pattern in a day or two.

Saturday, February 4, 2012

Seminole Patchwork

Over the next two weeks I am planning to give you a tutorial on Seminole Patchwork. At the end of the two weeks, if you follow along, you will have all the patches required to make a sampler.  I will also give you the directions for the sampler at the end.  It will be a sort of "mystery quilt", for me as well as you, since I haven't designed it yet.  I have taught classes in this technique for years and would like to share it with my readers.

Today I'm going to give you some background and pictures.  I'll start the tutorial on Monday.


The jacket pictured here is from the Miccosukee tribe in South Florida.  I've had it for over 20 years and use it when I teach a class.  The Miccosukee are a branch of the Seminole.  In the mid 1980's I was a graduate student at the University of Miami in Textile Design.  Often while shopping in local fabric stores, I would see some of the Indian women wearing their traditional outfits, with bands of patchwork, like the bands on the jacket.  I became determined to learn the technique.  On day I struck up a conversation with one of these women and she invited me to come to the reservation and observe the women at work. 

Several times over the next few months, I drove out the Tamiami Trail to a place where the tribe had a gift shop.  There the women sewed in a chickee, which is a sort of pole barn with open sides and a palm frond roof.  Most sewed on treadle sewing machines.  One thing that impressed me was the fact that they tore all the cloth strips for the patchwork.  At that time, they were only using solid colors, but they told me that in the early part of the 20th century, they had used calico because it was easier to obtain.  Since the 1930's they had also begun to incorporate narrow rick-rack into their designs.


This is a detail of the jacket.

This is a skirt that was made by the Miccosukee for the tourist market.  I bought it in a thrift shop in Miami in the 1980's and wore it for many years.

The origin of this style of sewing is unclear, but I have read that it may have developed during the War Between the States when slaves escaped to the Everglades and introduced the Indians to the tradition of narrow band weaving that originated in Africa.  The weaving skills may not have been practical or were not known, but the look could be accomplished with patchwork fabric bands.
 
I'm not sure how much of this tradition survives today.  The Seminole have gotten rich with casinos and some of this may be lost.  Although I occasionally visit South Florida (my son and family live there), I have never been to one of the casinos and have not had the time to drive out to the Everglades.

Below are closeups of a jacket I made a few years ago using some of the techniques that I will be showing you in the coming posts.


I hope that you will follow along with me as I sew on this project or watch and then try it later.  If you do make a sampler with me, I will post it on a later blog if you send me a photo.  

Enjoy the rest of the weekend and the Super Bowl tomorrow.  I'm not much of a football fan, but I do love the commercials and its a great excuse to eat junk food!