Tuesday, January 22, 2013

Lunch Box or Purse Variation


Yesterday at my ASG meeting someone (I think it was Helen) suggested that you could add straps and make a cute lunch bag out of the make-up bag that I showed in my previous post.  So guess what I spent the morning doing.

The bag is made the same way as the bag I showed you in the last post with the following changes:


  • You'll need two strips of the main fabric cut 5 1/2" by width of the fabric
  • You'll need 4 strips of craft weight interfacing cut 1 3/4" by width of the interfacing (mine was 22" wide)
  • For the outside pocket you'll need a piece of main fabric and a piece of lining fabric cut 6" by 4 1/2" and a piece of interfacing cut 6" by 4".
Step 1:  Make the straps.  Lay the interfacing on the center of the fabric and press one side toward the center.  Press the other side over this and turn under 1/4".  Press.


Top stitch down the fold and then stitch on edges.  (I used 5 rows of stitches, you'll need at least 3).
Step 2:  Trim the straps to 41", you can make them shorter,if you wish. I think I'll make them about 5" shorter if I make another one.  Pin the strap on one side 3 inches down from the zipper and centered 3 inches from the center of the bag.


Stitch on the outside stitch lines up from the bottom to the 3 inch mark, sew across and reverse and sew back again to be sure that it secure, then pivot and stitch back down to the base.
Step 3.  Adding a pocket.  I added a pocket to one side (shown in photo above).  With right sides together, stitch the top and bottom of the pocket.  No need to stitch the sides, they'll go under the straps.


The second photo above shows how to place the interfacing.  Press and turn.

Add the pocket under the straps about 1/2" below where the straps are to be stitched on top.


Top-stitch across the bottom of the pocket, then stitch the straps in place.

Now you can proceed with the construction in the same way I showed in my last post.

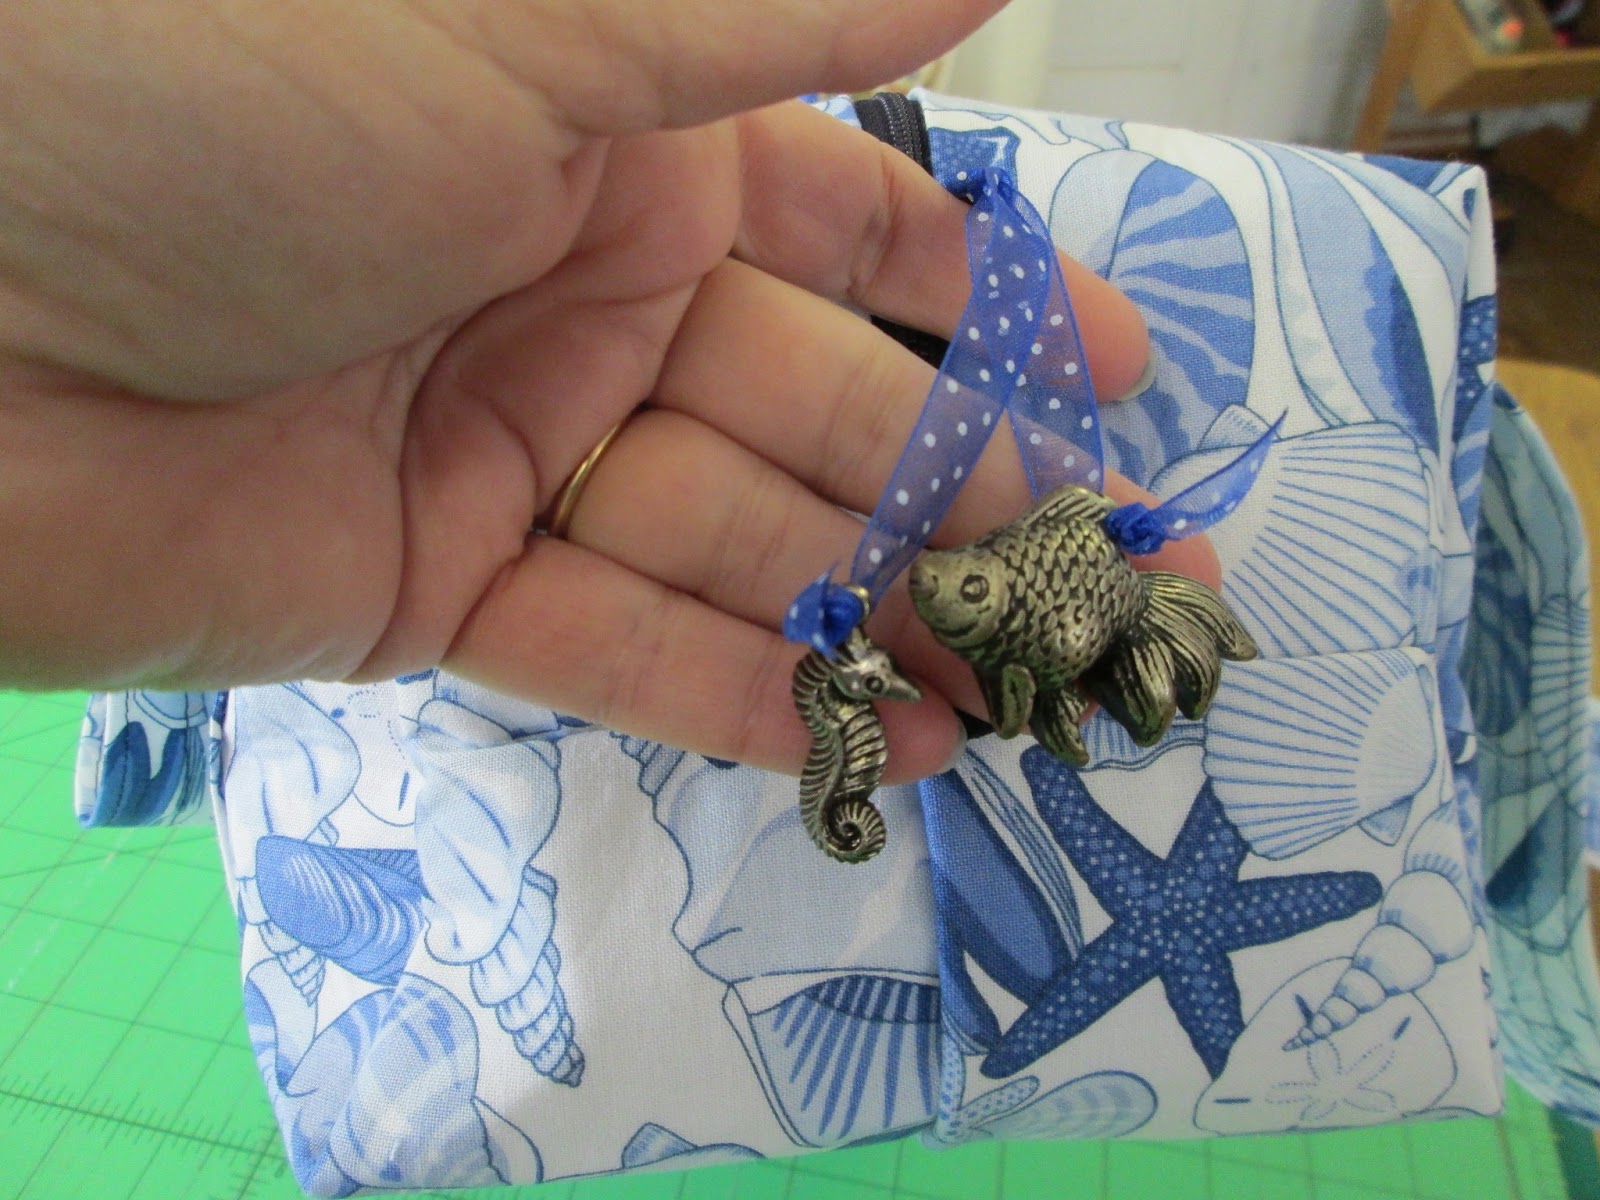
I also added a ultra-suede tab to each end of the zipper.  I just happened to have a small piece of navy ultra-suede.  I also added a ribbon and tied a fish and seahorse charm to the ends.

side with pocket


Unfortunately (or maybe not) I no longer pack a lunch to go to work and the few times I need to eat lunch out, I really prefer to just buy it.  But I think maybe one of my daughters or grand daughters might enjoy this.

Sunday, January 20, 2013

Large Make-up Bag Tutorial


I hadn't planned on making this or doing a tutorial, but I had a call two days ago from a friend who needed a program for our next ASG meeting.  Without knowing what I could do, I surfed Pinterest until I came up with a tutorial for this bag.  You can view the original here.  Its fine as is, but I felt it needed a little more body and a water proof lining, so here is my version.

Supplies needed:
1/3 yard of fabric for outside
1/3 yard of fabric for lining
1/2 yard of iron on vinyl
1/2 yard of craft weight interfacing
Thread
16" or longer zipper

Cut 2 pieces of outside fabric, lining, vinyl, and interfacing 12" by 16".  Following manufacturers instructions, iron interfacing to wrong side of main fabric and the vinyl to the right side of the lining fabric.  (be sure to read the instructions on doing this if you've never used this product.  It could really mess up an iron.)

I used a 22" zipper because 1. I had it on hand, and 2.  I like a longer zipper for this application.  When inserting it the pull-tab doesn't interfere with the stitching.

Place the lining with the vinyl facing up, then place your zipper along the 16" top edge.  Place your outside fabric face down and line it up with the lining and zipper.  Stitch along the zipper, being sure to keep the seam allowance even and not stitching through the zipper teeth.  The other tutorial has a good photo to help with this.

Fold the fabrics back and do the same with the other side of the zipper.  It should now look like this.
At this point, I decided to add a little "handle" to the end of the zipper like you see on men's travel bags.
I cut a piece of fabric 2 1/2 inches by 6 inches, folded it in half and then folded the raw edges inside to meet the first fold.
I pressed this and then top stitched it.

This is the loop stitched in place.  I also stitched several times over the zipper at this point to reinforce it before cutting off the excess.  On the other end of the zipper, zip the tab down to the center of the bag and then holding the edges together, stitch across the ends to secure them, as above.

Next, with right sides together, stitch the bottom seam.  I trimmed this to 1/2 inch and then covered it with a scrap of bias fabric.  You could also serge it, but it needs some kind of finish.
Fold the sides so that the bottom seam is even with the zipper and stitch across.  Do this on both ends being sure that the zipper is not completely zipped.  You'll need to be able to turn it right side out after the next step.


Fold each of the four corners as shown.  The measurement is 2 1/4" from the tip to the ruler and 4 1/2 inches from edge to edge.  Use your cutting board to square it up correctly.  I used a ball point pen to mark the vinyl at this point.  This is your stitching line.

Cut off corners as shown.

Turn to right side and add a ribbon to the zipper tab if desired.  I had some plastic pony beads that I tied on to the ribbons.
Without the extra interfacing and vinyl, this makes a nice shoe bag for travel or to store dress shoes.  It was the perfect size for my size 7 shoes, but if you have a larger foot, you could add 1 or 2 inches to the bag by cutting it 12" by 17" or 12" by 18".
It would also make a nice gift for a man if made in more masculine fabrics or a synthetic suede or leather.

Catch Up Time

I'm going to do two posts today.  This one to catch everyone up on my life since mid-December, the one to follow which is a tutorial for a large make up bag.

As I was preparing for the holidays (making last minute gifts, cooking, anticipating grandchild visits), one of my aunts was sent to the hospital with sepsis.  This is very serious in the elderly, so I was very concerned.  To complicate matters, she lives in a nursing home in Virginia Beach, so it meant a trip across the bay almost daily.

She improved, grandchildren arrived, Christmas followed.


Diana, Talila, and Sasha "building" the gingerbread train.

The day after Christmas, my other aunt, who has Alzheimer's, stopped eating.  She has been going down-hill for some time, but this seemed more serious.  To make a long story short, my uncle and I put her on Hospice and she passed away peacefully on December 30th.  She was my mother's younger sister.  The Virginia Beach aunt, who is now doing well, is my father's younger sister.  These two aunts were roommates in college and remained friends all of their lives.  Neither of them had any children of their own, so to my brother and I they were almost like second Mothers.

Dan and I had planned on leaving Jan. 2nd to drive to Fort Lauderdale to visit my son and his family (three more grandchildren) and take a 7 day cruise.  We didn't leave until the 4th because of my aunt's funeral.  Believe me, I've never packed so fast in my life.


Half-Moon Cay, Bahamas

I'm not a gambler, but I do like to play the slot machines a little.  There was a slot tournament on this cruise and guess what, I won!!! $500.00!!!  The next day I decided to push my luck and play Bingo, and guess what, I won!!!   $61.16, because six of us went Bingo at the same time.

I've been back now for a few days.  The laundry is finally done, suitcases unpacked and waiting to be taken upstairs.  Yesterday I took down a box that contained a project that I promised my mother I would finish for her.  She did beautiful crewel work and started this at least six years ago.  Then she broke her right shoulder and could not work on it.  Often when I visited her, she'd ask me to get it off the closet shelf for her.  On the next visit she'd tell me to put it back.  When she was dying last spring, she made me promise to finish it.  So here it is, I'll work on it slowly and keep you posted.