Thursday, April 26, 2012

A Brief Hiatus

I'm taking a short break from blogging. My mother has been back in the hospital for the past week, this time with pneumonia.  She is somewhat better, but I need to be with her in the hospital.  Yesterday, we had a problem with medications and if I hadn't been on top of it, she would have missed an entire dose of IV antibiotics.  Unlike those of you who live in large metropolitan areas, we only have one small hospital and don't have the option to go elsewhere.  This leaves us at the mercy of those who work there, some very good ones, and some not so good.

Hopefully by this time next week all will be back to normal.  I am missing my sewing, but have knit quite a bit while just sitting!

Sunday, April 15, 2012

Easy Ornament Tutorial

I know that its over 8 months until Christmas.  Maybe I'm early, but I decided to make these little ornaments to give as gifts to people who visit during the Artisans Guild Thanksgiving Weekend Tour.  So I made 245, to date.  And that's probably all I'm going to make, because I narrowed my Christmas fabric down from 2 boxes to 1 box.  Also I ran out of snowflake sequins.  If I run out, too bad.  You should come on Friday or Saturday if you want one.

 To make these you need a total of 4 circles of fabric (2 for the front and 2 for the back).  2 are cut  4 inch diameter and 2 are cut 3 inch diameter.  You will also need needle and thread, a piece of ribbon about 4 to 5 inches long, 2 snowflake sequins and 2 seed beads.
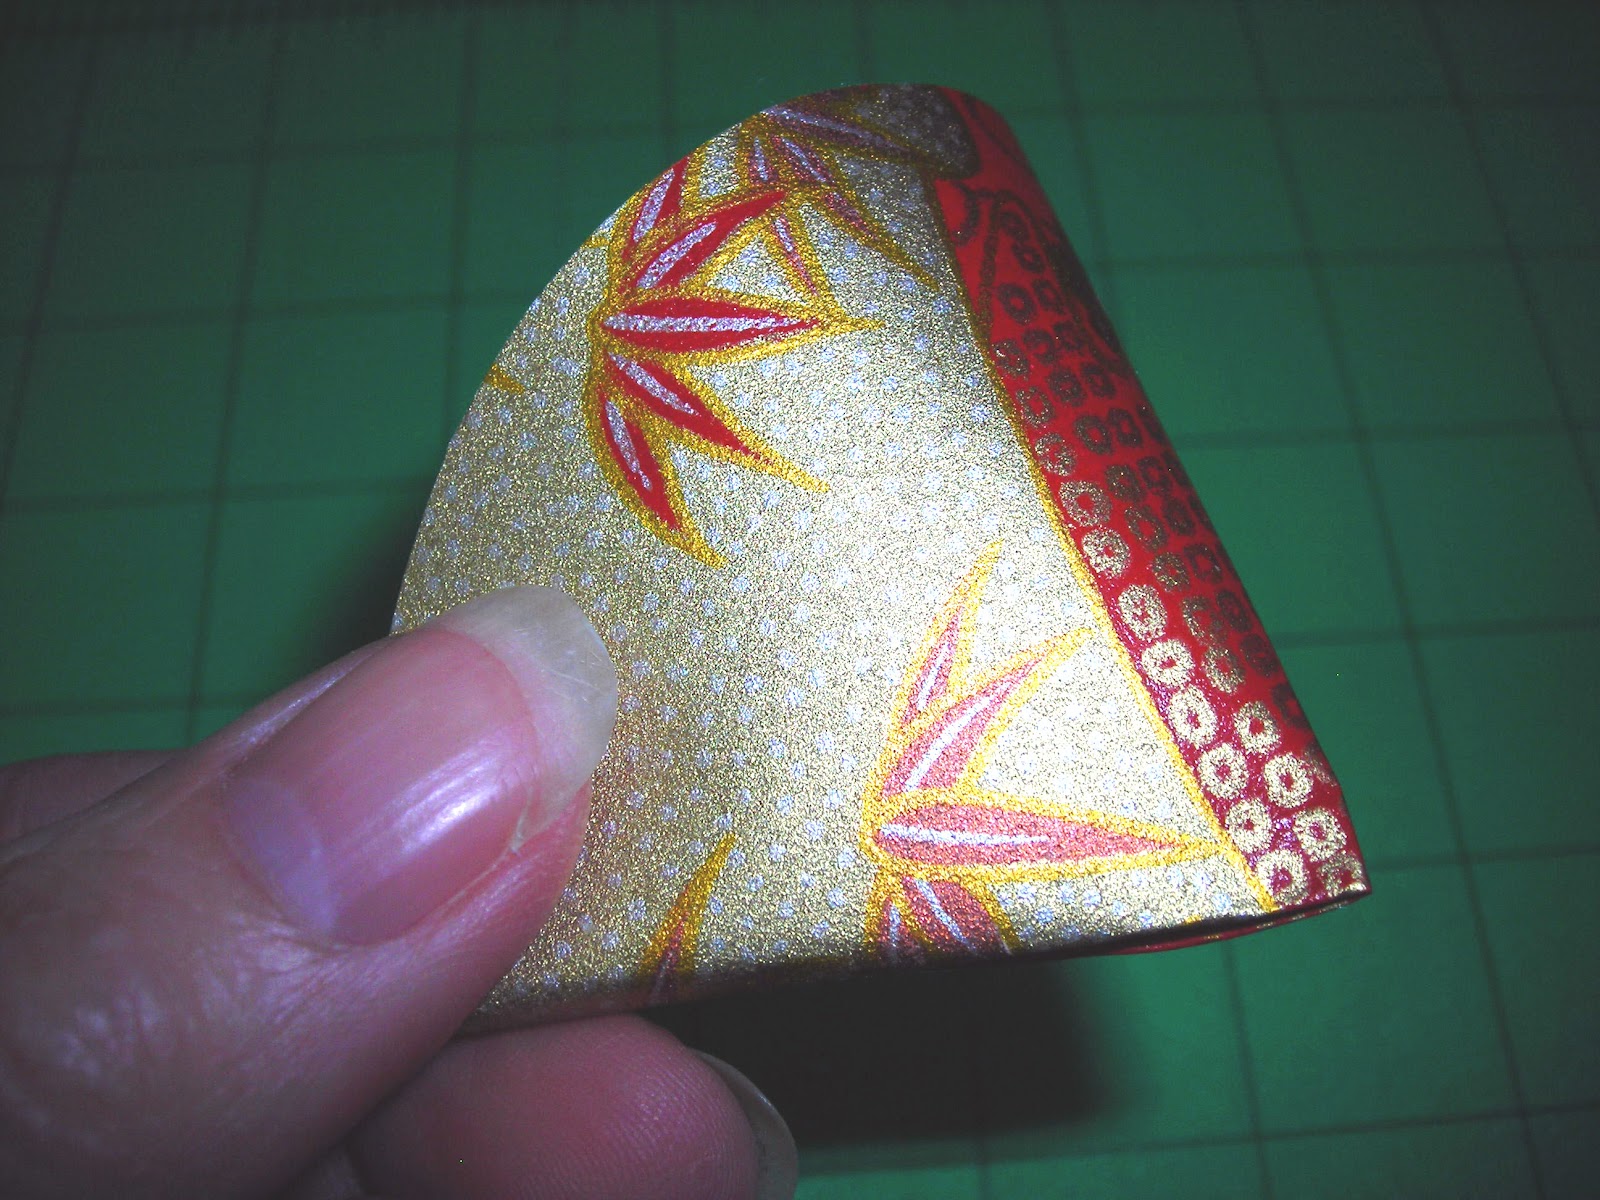
I'm using this piece of origami paper to illustrate this because it has a definite right and wrong side.  It is metallic, so there is some reflection, but its the only piece I could lay my hands on today.
Fold the circle in half and then half again to find the center.  You can either place a pin to mark it or just crease it, as long as you can tell where the center is.
Open the circle and fold one side up to the center.
Now, working clockwise, fold the corner to the center.
Fold the next corner to the center.
And the next corner.
And the next....
Now all raw edges are inside except for the tiny point.  This will be covered by either the smaller one of these or by the sequin.  Here is the order for making the ornament.  Have your needle threaded and knotted before you begin.
  • Fold one of the 4 inch circles as above.
  • Put the needle into the back, bring to front (in center) and make one stitch.  Thread and needle are now on back.
  • Make a loop of the ribbon and stitch this onto the back.
  • Make another 4 inch and sew this so that the two circles are back to back.
  • Make a 3 inch and place on top of one 4 inch, stitch through all layers to other side and add another 3 inch.
  • Now sew on a sequin using a seed bead to secure it.  
  • Go through to the other side and do the same
  • Bring needle to center (between the two 4 inch circles) and secure with a few stitches.
Done!!

It takes me 7 minutes to make one, not counting the time to cut the circles.  I've got it down to a science.  I just got out my calculator and figured out I spent 28 1/2 hours making these.  That's really kind of sick.
Here's a picture of my pile.

Wednesday, April 11, 2012

Back to Work, Hopefully

Its been over a week since I wrote, but life has a way of happening.  My mom was in the hospital over the Easter weekend, so I needed to be in and out of there to be sure she was o.k.  One of my daughters came to visit with my grandson.  But today, I finally was able to go over to the store and sew for a few hours.  I'll have a new project to show you in a day or two.

Sew much fabric, sew little time.

Monday, April 2, 2012

An Easter Project

This blog was going to be about a Christmas ornament that I am making, or rather ornaments, because I'm trying to make 300 and just finished number 158.  Then I thought "wait a minute, its Easter, no one wants to make these ornaments now".  (Well, except for me, I'm kind of obsessive-complusive).

Then I remembered this little quilt/table topper I made a few years ago for a sample in my shop.  And after an extensive search, I found it in a box.  The eggs are colored with crayons and it is a good activity quilt for your children or grandchildren.  The only real quilting on it is around the eggs; I quilted and appliqued at the same time.


You will need:
  • 1/4 fabric for border
  • 1/2 yard fabric for main part of quilt
  • 1/8 yard fabric for binding
  • 1/4 yard white fabric for eggs
  • Small amount of fusible webbing for back of eggs.
  • Backing
  • Batting
  • Fine line permanent marker (optional)
  • Coordinating thread, Crayons.  They do not have to be fabric crayons, any will work, but don't use markers because not all are water-proof.
Finished size is 26 by 18.
Cut 2 strips of fabric for the border, 3 1/2 inches by width of fabric.  Cut each of these into two pieces, one 26 inch piece and one 14 inch piece.
Cut the main fabric into a rectangle, 14 inches by 20 1/2 inches.  Sew the 14 inch strips of border fabric to the top and bottom, then sew the side borders on.
Now make a pattern for the eggs.  Mine is 5 inches long.  I just sketched until it looked right, but there is a tutorial on how to draw an egg here.

Next press the fusible web onto the back of the white fabric, following manufacturers directions.  Trace your egg onto the fusible and cut out.  Fuse the eggs onto the quilt.

I have 7 eggs on my quilt, you could have more or less depending on how large or small you want them.

Layer the top, batting and backing.  Using a small zig-zag stitch, applique the eggs to the quilt, stitching through all layers.  Add more quilting, if you wish.  Cut binding fabric and bind as usual.
Now the next step is optional, but I drew designs on the eggs using a permanent maker.  You can just let the kids make up their own designs.  Let the kids color the eggs with crayons and then to make the color permanent, place a paper towel over the eggs and press with a warm iron.  This will heat set the crayon color and you'll be able to wash it after Easter.

I hope everyone has a Happy Easter and/or Passover.